There are lots of reasons why you might need to beat egg whites. Beating egg whites isn't difficult, but they can fail to whip up into nice peaks for several reasons.
Similar to whipping heavy cream, one misstep and you'll have ruined your recipe, but I'll show you how to achieve perfect soft or stiff egg white peaks every time with these few simple tips.
Beaten egg whites play an important role in so many recipes including:
- meringues
- lemon meringue pie
- pavlovas
- marshmallows
- buttercream frosting
- angel food cake
- ladyfingers
- whiskey sours
- cloud eggs
- souffles
Chicken eggs are most often the egg of choice, but duck egg whites will also whip up into nice glossy peaks. Just remember that two duck eggs is equivalent to three chicken eggs, so measure out your eggs for your recipe carefully.
How to Beat Egg Whites Perfectly Every Time
Use Room Temperature, Fresh Eggs
To get started, it's important to use room temperature eggs. And the fresher the better. Fresh eggs have thicker whites which will lead to more voluminous, stable whites.
Room temperature eggs will whip up much faster and better than cold (or old) eggs. But eggs are easier to separate when they're cold, so take your eggs out of the refrigerate and separate them, then let the white sit out at room temperature for about 30 minutes before you begin.
(Of course if you have just collected eggs from your chicken coop or have some sitting at room temperature already, go ahead and separate those and you're ready to start!)
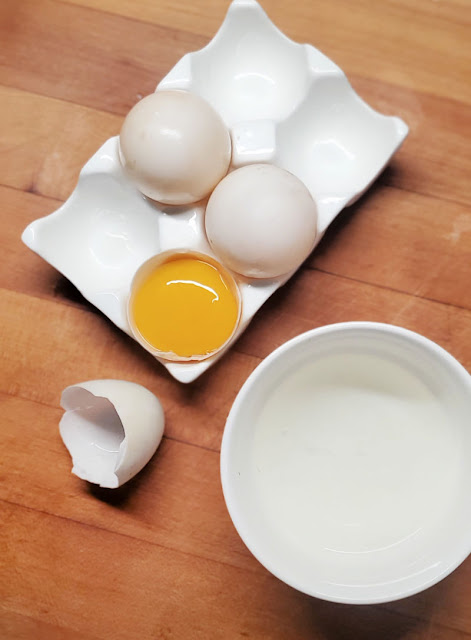
Separate each Egg Individually
The whites won't beat well if there's even a speck of yolk or shell in them, so if you're not a confident egg separator, it's a good idea to separate each egg into a small bowl first - then ensure there's no shell or yolk in it - before you pour it into your mixing bowl with the other whites.
Use the egg shell half to separate the yolk from the white, not your fingers, just in case there's any residue or oils on your hands.
Use Clean, Grease-Free Utensils
While you're waiting for your egg whites to come up to room temperature, wipe down your bowl and whisk with a lemon wedge (or paper towel moistened with white vinegar).
This will ensure that there's not a speck of grease or fat on your utensils.
Use a Metal Bowl
Metal bowls work best for beating egg whites. Copper bowls are best; the reaction of the white to the copper resulting in high, fluffy beaten whites.
Stainless steel bowls will work well also. Aluminum bowls shouldn't be used because the metals can react and turn the egg whites gray.
Glass bowls can be slippery, and therefore the whites won't whip as high. And a plastic bowl should never be used because the plastic can have a filmy residue left on it which will prevent the whites from beating correctly.
Use a Large Enough Bowl
Remember that the egg whites will whip up to more than 8 times their original volume, so be sure to use a bowl that's large enough. A regular stand mixing bowl can accommodate probably 6 to 8 egg whites quite easily.
Add a Stabilizer
It's not necessary unless you're using pasteurized egg whites, but adding an acidic stabilizer to the egg whites can lead to egg whites that hold up better.
Some common stabilizers include lemon juice (I hope you held onto that lemon wedge from earlier!), white vinegar, or cream of tartar.
For each egg white, add:
- 1/4 teaspoon fresh squeezed lemon juice
- 1/4 teaspoon white vinegar
- 1/8 teaspoon cream of tartar
Cream of tartar is the best choice for a stabilizer because adding liquid to your egg whites can result in a more runny mixture.
Since I already have the lemon wedge though, I usually just add a few drops of lemon juice to my egg whites after they've been whisked for about a minute.
Although in my experience, farm fresh eggs will whip up just fine without it.
How to Beat Egg Whites
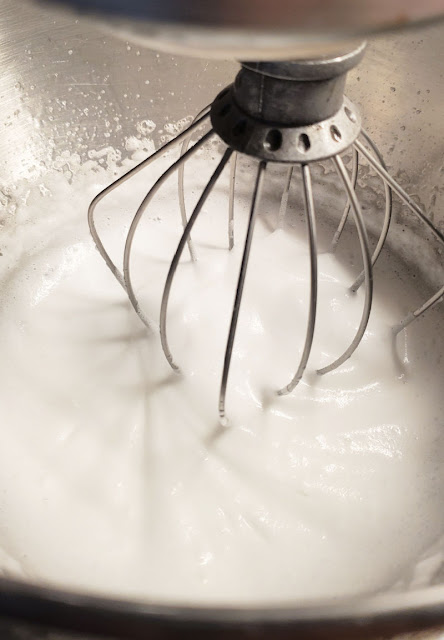
Add your egg whites to the bowl of a stand mixer (you can also use a hand mixer). Beat them on medium-low speed for about a minute, until frothy, bubbly and no longer clear.
This will give your egg whites a solid foundation and lead to more stable whites.
Beat to Soft Peaks
Add your stabilizer at this point if you're using one. Then increase the mixer speed to medium-high and beat for about 3 minutes for soft peaks.
At this point the whites should be billowy and about four times greater in volume than when you started. When you lift the whisk out of the bowl, peaks will form but quickly droop. At this point, if you need to add sugar to your recipe, you can start pouring the sugar in slowly while continuing to beat.
After a few minutes, rub some of the egg white between your fingers. If it's still grainy, continue to beat until the sugar is all incorporated. Superfine sugar is a better choice for beating into egg whites than regular granulated sugar.
Beat to Firm Peaks
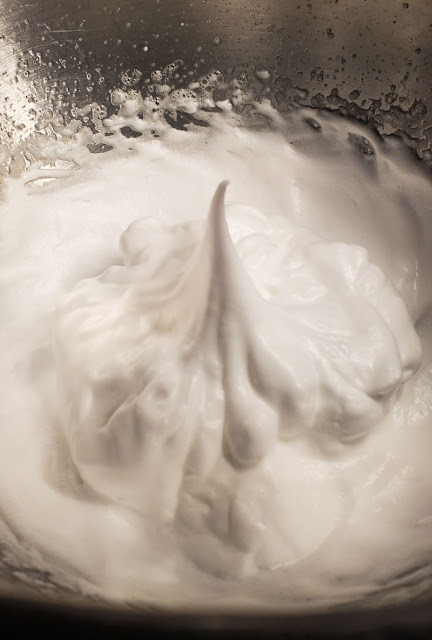
After a few more minutes, you'll reach the firm peak stage. At this stage, the egg whites should hold a peak, but curl slightly at the tip.
Beat to Stiff Peaks
Continue beating on high speed (for an additional 5 or 6 minutes past the soft peak stage) to the stiff peak stage.
At this point, your egg whites will be smooth and glossy and hold a peak when the whisk is removed from the bowl. You should be able to turn the bowl upside down and nothing will slide out.
Stop at this point. Over-beaten egg whites will start to look dry, not glossy, eventually separate and become grainy and unusable.
Use your beaten egg whites immediately or store, loosely covered, in the refrigerator for up to 6 days.
So to summarize my simple tips to beating egg whites perfectly every time:
- Use fresh, room temperature eggs
- Separate eggs carefully
- Use a clean, grease-free bowl and whisk
- Use the correct size metal bowl
- Consider adding a stabilizer like lemon juice
- Watch your egg whites and beat just until they reach the soft, firm or stiff peak stage
The Fresh Eggs Daily Cookbook
For recipes using beaten egg whites, plus dozens of other egg recipes, check out The Fresh Eggs Daily Cookbook. Available wherever books are sold.


