Keeping a clean chicken coop is, of course, optimal for the health of your flock. Your coop doesn't need to be spotless, but it does need to be dry and free of mold, mildew, parasites and the like.
It may surprise you that I only do a full-on, down to the studs, deep cleaning twice a year. Yup, that's it.
Just two times a year I do a really good, deep coop cleaning. Spring and fall, I clean all the old litter and nesting box bedding out and scrub down the whole coop with a white vinegar/water solution right before the weather turns cold - and then again when it starts to warm up again in the spring.
I like to clean my chicken coop in the fall just before winter to be sure there aren't any rodents or bugs that are planning on spending the winter, and to be sure the coop is nice and clean heading into winter when the chickens will be spending more time inside due to the longer periods of darkness.
And then again in the spring, just before we welcome new babies into the flock, I like to do another deep cleaning to make sure they start life in a clean coop.
The rest of the year, I do just minor maintenance that only takes minutes a day, raking out dirty bedding, maybe the occasional light dusting. But that allows me to maintain a clean, healthy environment for my chickens and ducks.
I split these chores into daily and weekly chores.
Daily Chores
- Scrape the poop from the roosts and dispose of in the compost pile.
- Spray any exceedingly dirty areas with coop cleaning spray, scrub with the brush and wipe dry with an old cloth.
- Use a rake to turn over the straw on the floor, especially in the area the ducks sleep in.
- Check nesting boxes for mud or poop.
- Fluff nesting material (I use these aspen nesting pads)
Weekly Chores
- Use a feather duster to dust any cobwebs in the coop and storage area.
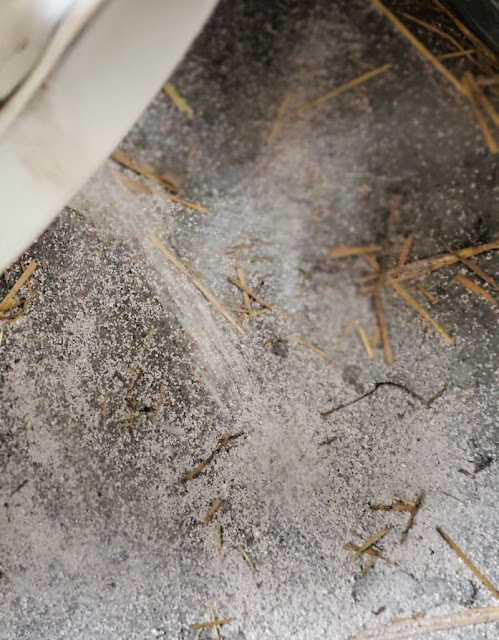
- Sprinkle food-grade Diatomaceous Earth or Coop Recuperate (love this stuff!) on the floor of the coop to dry the bedding and prevent ammonia fumes and insects/bug larvae.
- Add more straw to the floor bedding if needed.
- Refresh the nesting boxes with dried herbs.
- Hang fresh herb in bunches during the summer months.
Coop cleaning really doesn't happen on any real schedule, instead I use my eyes and nose to let me know when it's time - even a hint of any whiff of ammonia smell and it's definitely time.
Although extremely messy bedding does get removed and the nesting boxes are refreshed as necessary, after awhile the straw doesn't look fresh anymore and I know its time for a full coop cleaning.
Spring Chicken Coop Cleaning ... Naturally
I clean my coop the natural way. You wouldn't spray chemicals in your baby's crib to clean it, would you? Of course not. Nor do you want to use chemicals when you clean your chicken coop, no matter how dirty it gets.
Ammonia fumes can be dangerous to the chickens, causing eye and lung problems. And did you know that bleach can mix with the ammonia in chicken poop and create toxic fumes? So always use vinegar, not bleach, for coop cleaning.
Furthermore, products such as Sevin dust, aerosols sprays, Febreeze, air fresheners, creosote and other potentially hazardous products have no place in or around your chickens who are extremely susceptible accidental poisoning.
Fortunately, there are plenty of natural products you can use to keep your coop clean, smelling fresh and free of mites and other parasites.
Spring Chicken Coop Cleaning Supplies
Rake
Bucket
First Thing in the Morning
I always pick a nice warm, sunny day and let the chickens out to stretch their legs and free range a bit while I'm cleaning. Here's my down and dirty, quick and easy, spring chicken coop cleaning routine.
I always start at the top and work my way down to the floor.
- Take down window and nesting box curtains. Either launder or toss out and make new ones.
- First, rake out all the old bedding. Since I use straw, it goes either in the run if its muddy, in the garden or the compost pile.
- Next, sweep up any cobwebs.
- Dust the window screens and all other surfaces.
- Clean any flies or other bugs out of the window jambs.
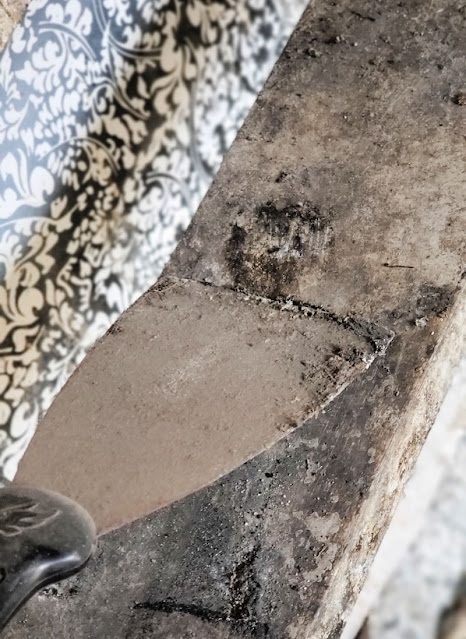
- Scrape any poop off the roosts, nesting box area or other flat surfaces into the bucket.
- Use a metal shovel to remove any stuck on manure on the floor.
- Then use a broom to sweep out all the dirt and debris from the floor.
- Scrub down the roosting bars, nesting boxes, wall (if necessary) and floor with the white vinegar/water mixture or Orange Peel Coop Cleaner diluted in water using a stiff brush or mop.
- Take this opportunity to run your hands along the roosts to check for splinters or mites (black spots or blood smears indicate the presence of mites).
- Then spray the roosts and nesting boxes with straight up Orange Peel White Vinegar Coop Cleaner. It's a great degreaser, insect repellent etc.
- Repaint or touch up as necessary.
- Open all the doors and windows and leave everything to air out until dry.
- And while you're at it, check windows and other points of entry for holes or weak points a predator might gain entrance, repair if necessary.
In the Late Afternoon
Once everything has dried out, and it's getting to be time to herd the chickens back inside for the night, I finish up with my spring chicken coop cleaning.
- Generously sprinkle food-grade Diatomaceous Earth on the coop floor and in the nesting boxes. Wear a mask to avoid breathing the airborne dust if you want and take care to keep the chickens out while you are sprinkling the DE because the dust can irritate respiratory systems.
- Replace the straw bedding on the floor so you have about a 6" layer. Replace the straw or nesting pads in the nesting boxes.
- Sprinkle fresh (or dried) herbs in the nesting boxes and liberally on the coop floor.
- Rehang curtains.
- Spritz the coop with Lavender Mint Coop Refresher Spray.
- Let the girls back in for the night - and listen to their contented coos over a nice, clean, scented coop.
And just maybe, they'll each lay you a beautiful egg the next morning as a thank you!


